Saturday, July 17, 2010
Wednesday, July 14, 2010
Friday, July 9, 2010
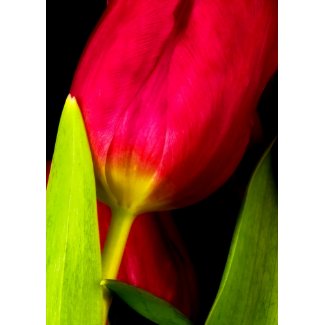
Floral Photography
Imagine lay out in the midst of a muddy field, eye strained to the viewfinder of your camera, waiting for the subject to stop swaying in the wind for half a second. Just half a second. As your neck begins to ache from the past ten minutes of laying in the awkward position you realise patience is indeed a virtue for nature photographers but sometimes it becomes quite obvious that the subject of your interest isn't going to play ball and you will have to wait until next time. Floral photography can be so unbelievably frustrating, not to mention time consuming - yet utterly absorbing.
So why are floral art prints so popular? Flowers and leaves alike possess pleasing symmetry, as well as a broad spectrum of shade and texture. Variations in sunlight and shade affect their appearance, as does the difference before and after rain. Drops of rain on a flower can greatly improve the look of the picture, whilst the range of colours to be found in leaves is immense. In conclusion, flowers are beautiful, and beautiful art prints make beautiful walls!
To begin with you will need the correct lenses for the job. A nice macro lens is ideal to allow you to get as close to the flower as possible and allowing you to get a nice depth of field. Extension rings are needed to focus this close with longer lenses. A tripod is essential for ensuring your flower photography is pin-sharp as is a cable release or remote as the slightest camera shake will render the photograph blurred.
The ideal flower photography has a soft, delicate style and requires a measured control of depth of field and focus. To create a masterpiece the colours need to be exquisite, the lighting perfect and composition just right.
The best time of day to shoot is when slightly overcast with a few clouds cutting the contrast but letting lots of brightness through. Bright sun can be the most difficult to work with as it delivers too much contrast and shadows. The solution can lie with various forms of light modifiers. Reflectors are ideal for bouncing light back onto shaded petals, or to pick out the underside of a plant. Diffusers are perfect for close up shots but for best effect the diffusion material must be placed virtually on top of the plant.
Switzerland has a wonderfully diverse selection of flowers so you are never far away from finding a great flower scene to photograph. Just remember to have respect for the wildlife in the area, including the flower you are photographing. Take care not to damage the flora and leave it all as you found it.
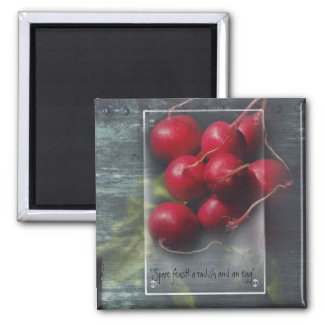
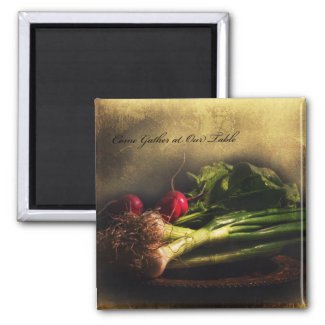
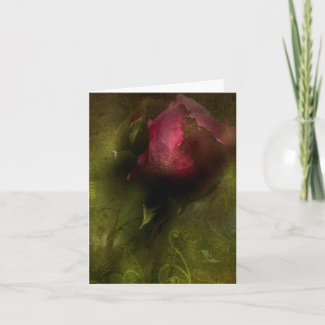
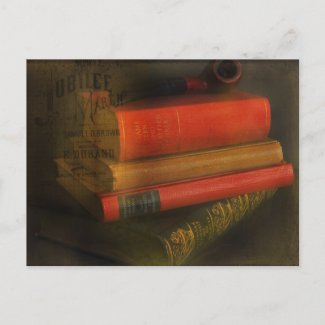
To purchase some of my floral photography as canvas wall art, or art print visit my RedBubble section which showcases a unique collection of images for sale.
Tuesday, July 6, 2010
Monday, July 5, 2010
Saturday, July 3, 2010
Friday, July 2, 2010
Wednesday, June 30, 2010
Tuesday, June 29, 2010
Sound familiar?
Sound familiar? How about this…“If you photograph our event for free, we will consider you for upcoming events.” What you now have to decide is if working for free will actually pay off. You want to break into the photography industry but the last time you checked, working for free doesn’t pay bills or put food on the table. In situations like this it is usually the photographer who gets the short end of the stick. Consider this as a reason why. The photography industry is saturated to the point you can wring it out and fill buckets! Companies know this and know there are plenty of people willing to work for free in hopes of getting their foot (and lens) in the door.
Here’s a few ideas to ensure both you and the organization come out as winners. I should also mention that dealing with non-profit organizations create some gray areas. Non-profits by nature rely on donations of time, money, and talent. You’ll need to judge each situation as it comes, but #3 below provides some guidance.
1. With companies, always make a trade. NEVER work solely for free. It cheapens you as a business and brings down the entire photography industry. If a company isn’t willing to pay you now, more likely than not they won’t be willing to pay in the future.
2. Consider swapping photography services for marketing/sales opportunities. As an example, if the company is acknowledging sponsors of its event, make sure your info is listed as an in-kind sponsor with your name, website and type of service. Another example is including your marketing collateral (business postcard, promotional swag, etc.) in the company’s gift basket.
3. If you’re offering your services pro bono to your favorite non-profit, do not be afraid to ask for something in return. Here’s an example: let’s say you set-up a mini studio at a non-profit’s annual family picnic. You handle the photography for free and in return are allowed to sell the images. Some photographers even print a free 4×6 image on the spot with ordering details for larger sizes. Get creative and think out of the box. You may only spend a few minutes with the family but people are always more inclined to use someone they are familiar with for future photography needs.
4. Let’s say a local radio station is starting its summer concert series and you really want to get in on the events. Offer to shoot one event for free provided they are willing to book two additional events for pay. If they agree to an arrangement like this, get it in writing and make them sign it! Also state when you expect payment.
Have a number in your head of how many trade and free events (non-profits) you are willing to work during the year and stick to it. The last thing you want to do is overwhelm your schedule with unpaid events and become “that guy” who works for free. I realize that building a portfolio and gaining experience is a challenge, but do not sell yourself, your time, or your talent short.
There are as many ‘for trade’ possibilities as there are stars in the sky. Again, get creative! If you have a great idea to share with other photographers, please post it in the comments section below.
Sunday, June 27, 2010
Visualizing
Making your description interesting is largely about creating clear and occasionally striking images for the reader to visualise.
Description With Emotion
What really gives your description depth is relating how it makes your characters feel, showing their emotional response through the words and images you choose. Good description layers in emotions, almost giving what is being described a personality.
“The skerry was resting in the sea. It was like being in a cradle, or on a deathbed, he thought. All the voices hidden in the cliff were whispering. Even rocks have memories, as do waves and breakers. And down below, in the darkness where fish swam along invisible and silent channels, there were also memories”. Henning Mankell (Depths: A Novel)
The character’s emotions and mood are projected onto the landscape here, showing his age, solitude and loneliness. The comparison of the boat to a cradle and deathbed is complex, showing the narrator to be looking both forward and back in his life and comparing old age to infancy.
Five Senses
It is easy to focus on the visual when describing a place, carefully detailing the colours and shapes of things. Don’t forget our other senses: taste, touch, smell, and sound. Working these into your setting descriptions adds colour and texture, allowing the reader to imagine themselves in the scene and really bringing an experience of place onto the page rather than just a cool photographic distance.
Spending a little time to nail that perfect word or image can really pay off with your description. Keep it brief, keep it relevant, work it into your story and the reader won’t be able to skip it.
Saturday, June 26, 2010
How to take a better portrait shot for your business or Social Media
With social media on the rise these days and business competition being fierce, you need to have a winning bio shot for your business. Below you will find a few tips to help your photo shoot go better.
1. Get lots of rest the night before.
2. Avoid sugar, alcohol and carbs the night before, they make you bloat.
3. Stay away from busy patterns around your face
4. Women don't over do the makeup, blend, blend, blend and if you are not a pro with your makeup skills, hire a makeup artist.
5. Remove any unwanted facial hair - today's cameras shoot in such high definition that you see every detail.
6. Whiten your teeth if they need some brightening and drops for the eyes.
7. Wear flattering colors, men if you have blue eyes then a blue shirt will make them pop and look amazing.
8. Relax, think of something that makes you happy while shooting - family, favorite pet, etc. Don't worry if there are a few bad shots in the bunch....that is why they have the delete button.
9. Update your photo from time to time so it does not become outdated.
Embrace your flaws, they add character and are a part of you. It is not realistic to expect to look 20 again and photographers are not plastic surgeons. While some work can be done for slight improvements in photoshop it is best to look like yourself. I have heard more than one person tell me they would not trust a person if they looked 25 in their photo and reality they were in their 50s.
Have a great shoot!
Dania Reichmuth
Nature & Portrait Photography
Member: Photo Suisse
Your Passion
would you like to know how to decide what area of photography to focus your career on.
Everyone is really spot on when they encourage you to find your passion. What excites you the most? What are your strengths as a photographer? What aspect do you find yourself avoiding? Are you comfortable and good with people? Do you enjoy complex, detailed shoots, or do like more flexible open situations? These questions should help you get to the internal aspects (self awareness) of your selection. Obviously, you need to explore the external aspects - what is out there that catches your attention and allows you to express yourself in the way that you want? Test the various options so you can experience them and not just decide based upon what you think something will be like.
Everyone has a career path that typically is filled with exploration. As you explore, pay attention to what excites you the most. Do you have a natural talent for something? Watch for opportunities to meet other photographers, and continue to ask questions.
Friday, June 25, 2010
Thursday, June 24, 2010
Sunday, June 13, 2010
Saturday, May 8, 2010
Friday, May 7, 2010
Wednesday, May 5, 2010
Tuesday, May 4, 2010
What is your top source of inspiration in photography?
Accomplishments of Mankind
I’m always amazed at the things we (humans) are capable of. I think people forget how far we’ve come in the last 1000, 100, 10, and even 1 year. Our lives are filled with stuff that was invented and built by other humans. Skyscrapers, bridges, machinery, vehicles, entire cities, and our cameras — all completely unnatural, yet so normal to us. I find this artificial world to be so fascinating, and it inspires me to capture it in my images. The things we know today will disappear and change before the end of tomorrow. I look back at images of our creations from the past, and it helps to give me a better appreciation for what we have today. I hope that some of my images will do the same 50 years from now.
Beauty of Nature
The accomplishments of man are amazing, but nature’s beauty is unmatched. There’s something so pure and innocent about it. Nobody invented it, thought it up, or built it — it just is, it always has been, and it always will be. Sure, things change over time, but that doesn’t make it any less natural. I don’t know what it is about pure untouched nature, but it catches our eye. Beautiful scenes and landscapes are out there waiting to be discovered — and if a photographer is there, waiting to be photographed. You can’t take nature’s beauty back with you to your home, but a good photograph is a close second. Capturing nature in a photo is one thing, but capturing the beauty of nature in a photograph is entirely different.
Other Photographers
I’m a learner — always have been, always will be. If I’m not formally learning in a school system, I’m picking up things from people with a common interest. Photographers inspire me to try harder, try new things, and see things differently. I look though portfolios and galleries, making mental notes of the elements, compositions, post-processing, styles, and subjects that I like. I try to take those things and incorporate them into my own work — not for the sake of copying, but for growth and learning on my part. I also read a lot of articles and blogs about photography. I find these things to be a great source of inspiration when I come across a thought or technique that’s new to me. I usually can’t wait to get out and experiment with these new things. I can only hope that what knowledge I have can be passed on to other photographers through my photography and my writing.
Challenge
I’m so extremely competitive when it comes to the things I’m passionate about — I’ve always been that way. I take challenges and competitions as personal goals in order to better myself in some way. Photography contests are one way I challenge myself. I put my work up against the work of other photographers, in hopes that other people will enjoy my photography. I do it for myself, and by that I mean that I don’t compete using photos that I think other people will like — I use the photos I like. Another way I get inspiration through challenge is to set goals or restrictions on myself in such a way that I’ll have to get unconventional. I might go out for a shoot with just one lens on the camera, forcing myself to find new compositions that I might have otherwise overlooked. I might restrict myself to photograph things or scenes that contain one specific color or shape. In Photoshop, I may force myself to use one specific editing technique, then try to make something of it. Whenever I challenge myself, the end results aren’t always the best, but I usually learn something worth hanging on to for future use.
Monday, May 3, 2010
Constructive Criticism: How To Guide
The goal in constructive criticism is to critique an individual so they will benefit or improve.
How do we give constructive criticism without "patting them on the back" for subpar work or give unconstructive and pointless critiques that the person does not take it seriously?
Here are some pointers to constructive criticism.
1. Constructive criticism has to be genuine. A person giving this criticism has to genuinely feel it is important to give it.
2. The person receiving the criticism must have some level of understanding of your role, and understand that you truly want them to improve.
3. Do not use statements like, “I want you to…”, “You must understand…”, “You must see the difference…”, “I need you to…”. You are immediately setting the stage for the individual to become defensive, especially if there is already a bad history of communication.
4. Take a team approach. In other words, sentences like, “Let us look at the following…”, “We can fix this by...” By doing this, you have created a collegiate type atmosphere. Both individuals are on the same level. Now you can set the stage to critique, not criticize, and then begin to construct a foundation for improvement.
Constructive criticism takes time and practice. If we want others to accept constructive criticism immediately, that will not happen. Constructive criticism presented in a positive way, as well as open communication, takes practice. Constructive criticism must be used effectively if the receiver is to improve.
A good "template" to a constructive critique.
1. Start off the critique with a postive note about the artwork such as "This is a good start" or "This is nice piece". In all retrospect there is no such thing as bad art, since it is all relative.
2. Give the negative points of the artwork. This should still be done in a postive way. Avoid such words as "bad, horrible, ugly, I don't like, etc". Try using words that pull you into the work such as "This area needs..." or "I believe that this area...". These need to be honest but still nice toward the artist.
3. Give points on how to improve the negative areas you just pointed out. This is very key, if you say an area needs work and leave it at that, the artist will not know how to improve it. We can't read minds so we need to know what it is you are thinking. If all possible give examples bring yourself into their field.
4. Give positive points of the artwork. This is the time to build the artist up. By telling them the things that you like, this will help them realize what areas they are strong in. The negative shows them what areas they are weak in... see the pattern? You need to examine the picture, if you can't find a positive aspect then I suggest to look further or not give a critique.
5. Finally end with a strong postive note. "This is good." "Keep up the good work", "You're coming along nicely" etc.
By thinking about these aspects you can help and artist improve. And build moral after all is said and done.
Monday, April 19, 2010
Wednesday, April 14, 2010
Architecture Photography
Lighting is a crucial part of architectural photography. Of course we have no say over the position and orientation of a building, and lighting the building ourselves is usually out of the question (not to mention expensive!). Instead we have to make do with what nature provides.
Side-front lighting usually produces the best architecture photos. It provides plenty of illumination and also casts long, interesting shadows across the face of the building, making its surface details stand out and giving the building a more three-dimensional look.
Back lighting is the worst kind for architectural photography because it creates very uniform, dark surfaces. The best way to deal with a backlit building is to either crop out the sky and use a longer exposure to rescue some of the detail, or photograph the building as a silhouette. Alternatively you could wait until it gets dark...

